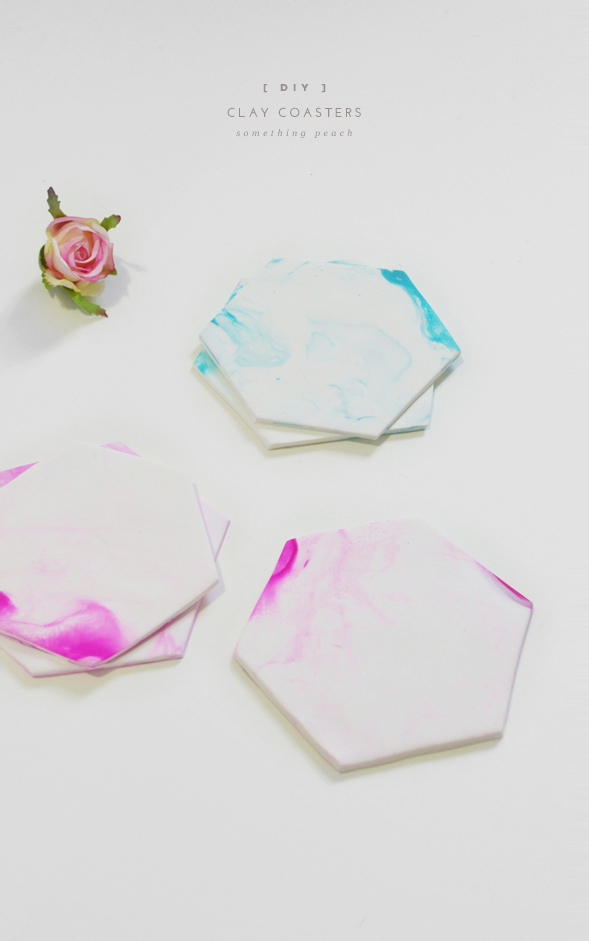
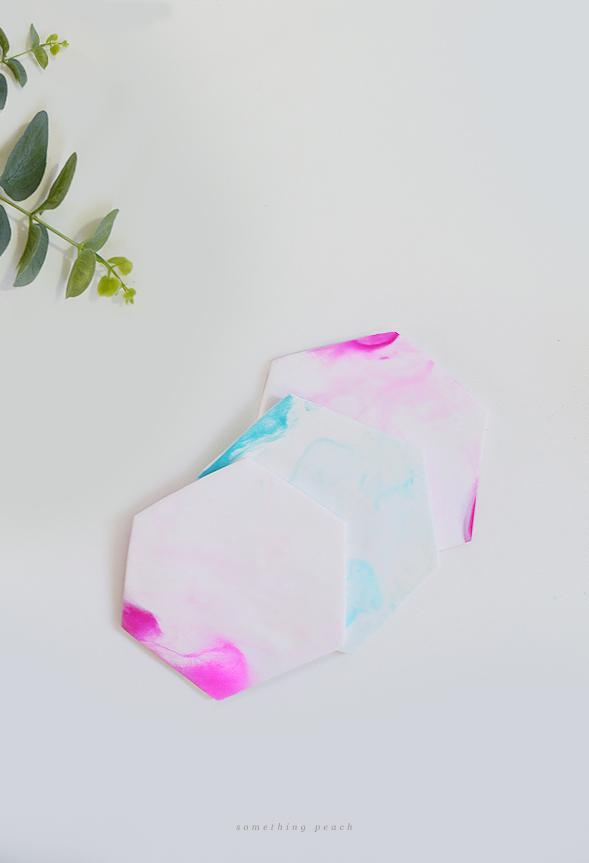
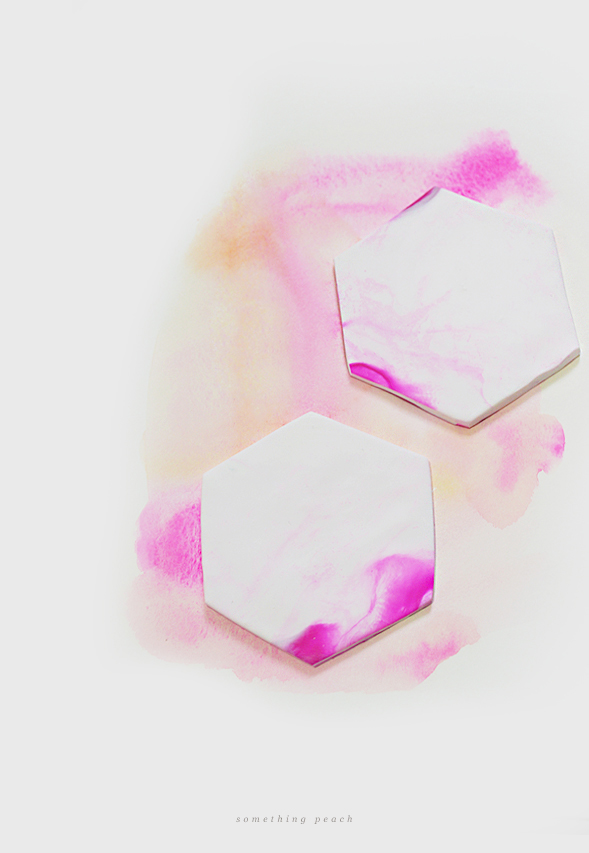
DIY // clay coasters
I was meant to post this project 2 days ago, but wasn’t able to because I was sick. I really dislike being sick, not being able to do anything and feeling completely helpless. It was very frustrating, especially when I had planned many things to do. I knew I wasn’t going to be productive no matter what I tried, so I decided to focus on my recovering by attempting nothing but sleep and meditation, leaving my phone and computer behind. I’m still in recovery mode but feel much better and in a brighter mood to resume blogging:)
Hope you are feeling healthy and well, motivated and ready to enjoy tackling this project!:) If you are looking for another similar DIY project, you can check out my first coaster project I posted a while ago.
What you need
– FIMO soft polymer modelling clay – White 350g & and Raspberry 56g (Enough for 5 coasters)
– Rolling pin
– Craft knife
– Oven
How to make it
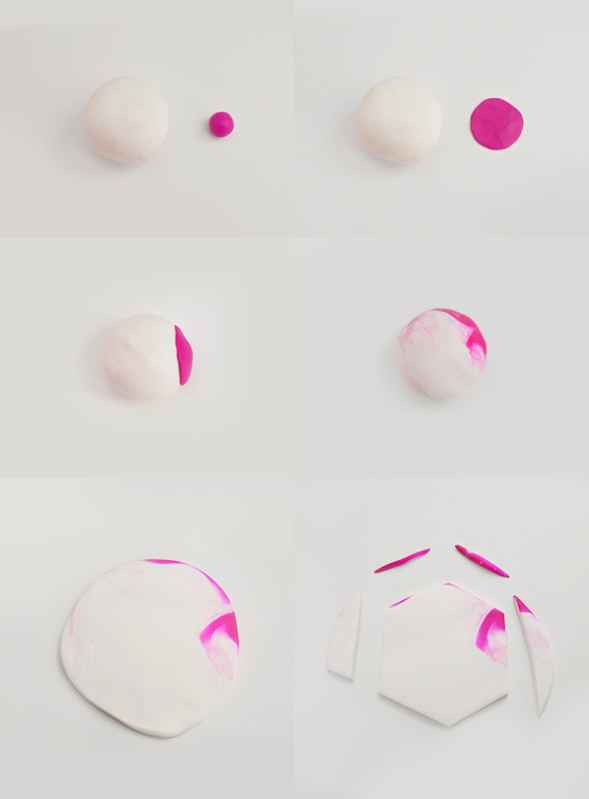
1. Roll the clay into a ball. Combine colours to your preference. (I used 1/5 of the white clay and just a small piece of raspberry clay.)
2. Flatten the raspberry ball into a flat circle. It’s quite small so you can easily do this using your hands.
3. Stick the raspberry circle on the side of the white ball.
4. Gently rub raspberry piece over the white ball in one direction to remove the harsh edge between the two. (I really wanted a water colour effect rather than a typical marble effect, so I experimented many times to find the best way to achieve this effect!)
5. Keep rubbing until you get the desired pattern.
6. Use a rolling pin or a similar tool to roll the ball into a flat circle.
7. Cut the circle into hexagon shape using a craft knife.
8. Bake it for a maximum of 30 minutes at a temperature of 110°C/230°F.
9. Let it cool and enjoy!


This is so cool I tried it and used them for birthday pesents
Great to hear that you used them for birthday presents Mads!I’m thinking to make some more for presents too:)
This is a great idea to place rings, too! Thanks for the post, I’ll definitely be trying this out some time. ^_^
Yes, they would work perfect to place rings! Great idea!:)
Thank you for this tutorial! I am going to give it a try this weekend! I’m also going to add gold paint on the edge to add a little to them. And I posted your tutorial on my blog to share 🙂
Hi Lisa,
Thank you for the comments, adding gold paint on the edge is such a cool idea! Looking forward to seeing your coasters on your blog!:)
These look awesome! I love playing with clay and the marble effect is really fun. I know what you mean about being sick…it’s hard to be unproductive. I just pretend that watching a ton of episodes of one show is productive in its own sense 🙂
I like your idea of being productive by watching lots of episodes of tv show Caitlin! Haha, I will try that next time!:)
This is such a fantastic idea! I’m so in love with it!
Thanks Louise!:)
Hi! These are great! Did you have to coat the coasters with anything before using or do they hold up to a little moisture from cups and glasses?
Hi Courtney, I’ve been using them without any coat till now and they seem ok:)
Do you think these could be shaped a bit to make a small plate? Also, does anyone have luck adding paint to them?
I need a clay plate to paint Ancient Persian designs on for a children’s festival.
Hi Nikki, yes they could be shaped to be a small plate, if you would like to paint I recommend using acrylic paint:)
x
This is such a beautiful DIY. I just tried making ring bowls and I will try this one with the leftover polymer clay. Thanks for sharing.
Michelle
http://www.michelleford.gy/blog
Thanks Michelle, making ring bowls is such a great idea! Hope you make beautiful ones:)
Do you put the clay right on the oven rack or do you use a baking sheet? If you use a baking sheet, would you suggest using wax paper or parchment so the sheet isn’t ruined?
Hi Nicole, I put the clay on the baking sheet, parchment paper is recommended:)